Transform Your Engagement Photos with Hand-Drawn Save the Date Overlays
You have finally secured your venue, picked a date that works for everyone, and survived the initial chaos of engagement planning. Now comes the part that often stalls even the most organized couples: announcing the big news to friends and family in a way that feels authentic to your relationship. If you are looking to move away from generic, mass-produced templates, Save the Date Overlays offer a practical, artistic solution that bridges the gap between professional design and personal touch.
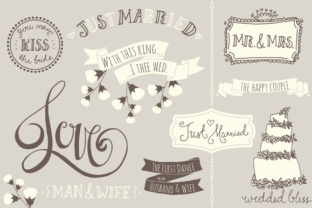
These resources are not just digital stickers; they are a collection of hand-drawn, vintage-style elements designed specifically to adorn your engagement photography. Whether you are a DIY bride trying to keep costs down, a freelance graphic designer needing quick assets for a client, or a hobbyist who loves scrapbooking, these overlays provide the structure you need without dictating the entire aesthetic. The core concept is simple yet powerful: you take your favorite photo, place a transparent PNG overlay on top, and instantly elevate the image with custom typography and artistic flourishes.
Why Hand-Drawn Aesthetics Matter in Digital Announcements
In an era where every smartphone camera produces crystal-clear, high-definition images, there is a growing desire for warmth and imperfection. Perfectly polished photos can sometimes feel cold or distant. This is where the vintage style of these overlays shines. They introduce texture, organic lines, and a sense of nostalgia that makes the announcement feel like a cherished heirloom rather than a digital file.
When you use Save the Date Overlays, you aren't just adding text; you are framing your memory. The hand-drawn quality suggests effort and care, signaling to your recipients that this event is special. For couples who met in coffee shops, love hiking, or have a bohemian wedding theme, these rustic and artistic elements align perfectly with their personal brand. It allows the photograph to remain the hero while providing a sophisticated container for the essential details: the names, the date, and the location.
Real-World Applications for Different Users
The versatility of this toolset means it serves a wide variety of users beyond just the engaged couple. Understanding how different people utilize these files can help you decide if they are the right fit for your project.
- The DIY Couple: For partners managing their own wedding stationery budget, these overlays are a lifesaver. Instead of hiring a designer for hundreds of dollars, you can purchase the set, open the file in Photoshop, type your date using a free font like Amatic SC, and print them at home or via an online service. The included PSD files allow you to change colors to match your wedding palette—whether that's coral, blue-green, or classic black—without needing advanced design skills.
- Freelance Designers and Stationers: If you run a small business creating invitations for clients, time is money. Having a library of pre-made, high-quality overlays allows you to turn around projects faster. You can customize the layers for each client, ensuring uniqueness while maintaining a efficient workflow. The vector files (AI and EPS) mean you can scale elements for large format prints or shrink them for social media graphics without losing resolution.
- Social Media Managers and Bloggers: Wedding bloggers and influencers constantly need fresh content. These overlays work beautifully for Instagram stories, Pinterest pins, or blog headers. By adjusting the transparency of the PNGs, you can create subtle watermarks or bold announcements that drive engagement without obscuring the underlying photography.
- Educators and Workshop Leaders: Those teaching digital design or photography workshops can use these sets as practice material. They offer a real-world scenario for students to learn about layering, masking, transparency, and typography within Adobe Photoshop or Illustrator.
Navigating the Technical Requirements
While the end result looks effortless, achieving it does require a baseline level of technical comfort. It is important to be realistic about the learning curve before diving in. To get the most out of Save the Date Overlays, you will need access to and basic proficiency in software like Adobe Photoshop or Adobe Illustrator.
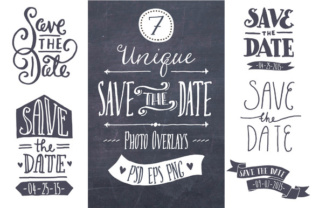
The package typically includes 84 PNG files across various sizes and colors, which are the easiest to use. You simply drag and drop these over your photo. However, the true power lies in the layered PSD and vector files. These allow you to edit the actual date, change the font, or rearrange decorative elements. If you have never opened Photoshop before, you might find the interface intimidating initially. In this case, it is worth watching a short tutorial on "how to edit text in Photoshop" before purchasing.
One specific consideration is typography. While the overlays come with beautiful hand-drawn frames, the text is often separate or requires you to input your own. The standard recommendation is often a font like Amatic SC, available for free on platforms like Font Squirrel or DaFont, which complements the vintage vibe. However, part of the fun is experimenting. You might prefer a sleek serif for a modern twist or a bubbly script for a playful feel. The flexibility to swap fonts ensures your invitation doesn't look like a cookie-cutter template.
Customization Tips for Best Results
To ensure your final product looks professional, consider these practical steps during your design process:
- Photo Selection: Choose engagement photos with negative space. If your photo is busy with background details, the text might get lost. Look for images with sky, blurred backgrounds, or solid walls where the overlay can sit comfortably.
- Transparency Adjustments: Don't be afraid to lower the opacity of the overlay. Sometimes a 80% opacity blend looks more integrated and less like a sticker slapped on top. This helps the texture of the photo show through the ink lines.
- Color Coordination: Use the included color variations (black, white, gray, blue-green, yellow, coral) to test contrast. If your photo is dark, a white or yellow overlay will pop; if it's a bright beach shot, a navy or black element might ground the composition better.
- Print vs. Digital: Remember that screens and printers display color differently. If you are printing these at home, do a test run on cardstock to ensure the colors match your vision. The files are provided at 300dpi, which is the industry standard for high-quality printing, so you are starting with the right resolution.
Making the Right Choice for Your Project
Before downloading or purchasing any design asset, ask yourself what your end goal is. Are you sending physical cards via mail, or is this purely for a digital save-the-date email? If it's for print, ensure you have the correct paper and printer capabilities. If it's digital, consider how the image will look on mobile devices where screen real estate is limited.
The value of a comprehensive set like this lies in its organization. Having fully labeled, layered vector files means you aren't fighting with grouped elements five minutes before your deadline. It respects your time. Furthermore, the inclusion of Photoshop brushes adds another layer of utility, allowing you to stamp these designs onto other materials like envelopes, thank-you cards, or even wedding favors.
Ultimately, Save the Date Overlays are about empowerment. They give you the tools to present your story exactly how you envision it, blending the convenience of digital editing with the soul of handcrafted art. Whether you are a seasoned designer or a novice eager to learn, these resources remove the barrier between your imagination and the final invitation, letting you focus on what really matters: celebrating your upcoming union with the people you love.